Dermatology
Mohs Surgery
Skin Cancer
Acne
Eczema
GentleCure
Aesthetics
Injectables
BOTOX® Cosmetic
Dysport
Daxxify
Sculptra
Revanesse Versa
Dermal Fillers
Kybella
Skin Rejuvenation
Microneedling
Morpheus 8
CO2 Laser Resurfacing
Hydrafacial
Facial Menu
Laser & Light Treatments
Laser Hair Removal
Medical Weight Loss
GLP-1 Weight Loss Injections
Other Aesthetic Treatments
ALASTIN Skincare®
Latisse (Eyelash Growth)
Plastic Surgery
Hair
Hair Restoration
PRP Hair
PRF Hair
Microneedling with Exosomes
Home use class
Before & After
Mohs Surgery Gallery
Neuromodulators Gallery
Dermal Filler Gallery
Kybella Gallery
CO2 Laser Treatment Gallery
IPL Treatment Gallery
About
Practice Overview
Our Providers
Join Our Newsletter
Resources
Patient Forms
Practice Policies
Insurance & Financing
Allē Rewards Program
Aspire Rewards
Pre and Post Treatment Guidelines
Blog
Shop
Shop
(805) 434 2821
Contact Us
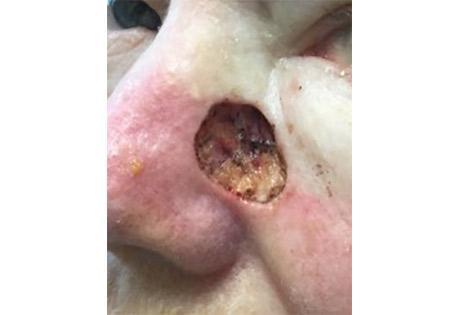
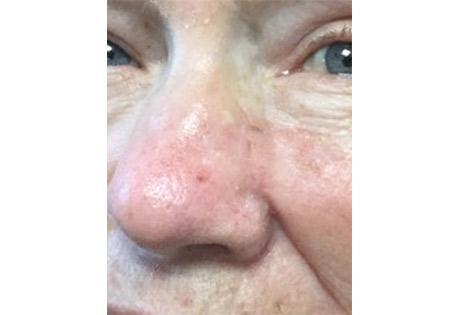
MOHS Surgery Gallery
Home
.
MOHS Surgery Gallery
.
Patient 11
Prev
Next
Before
After